
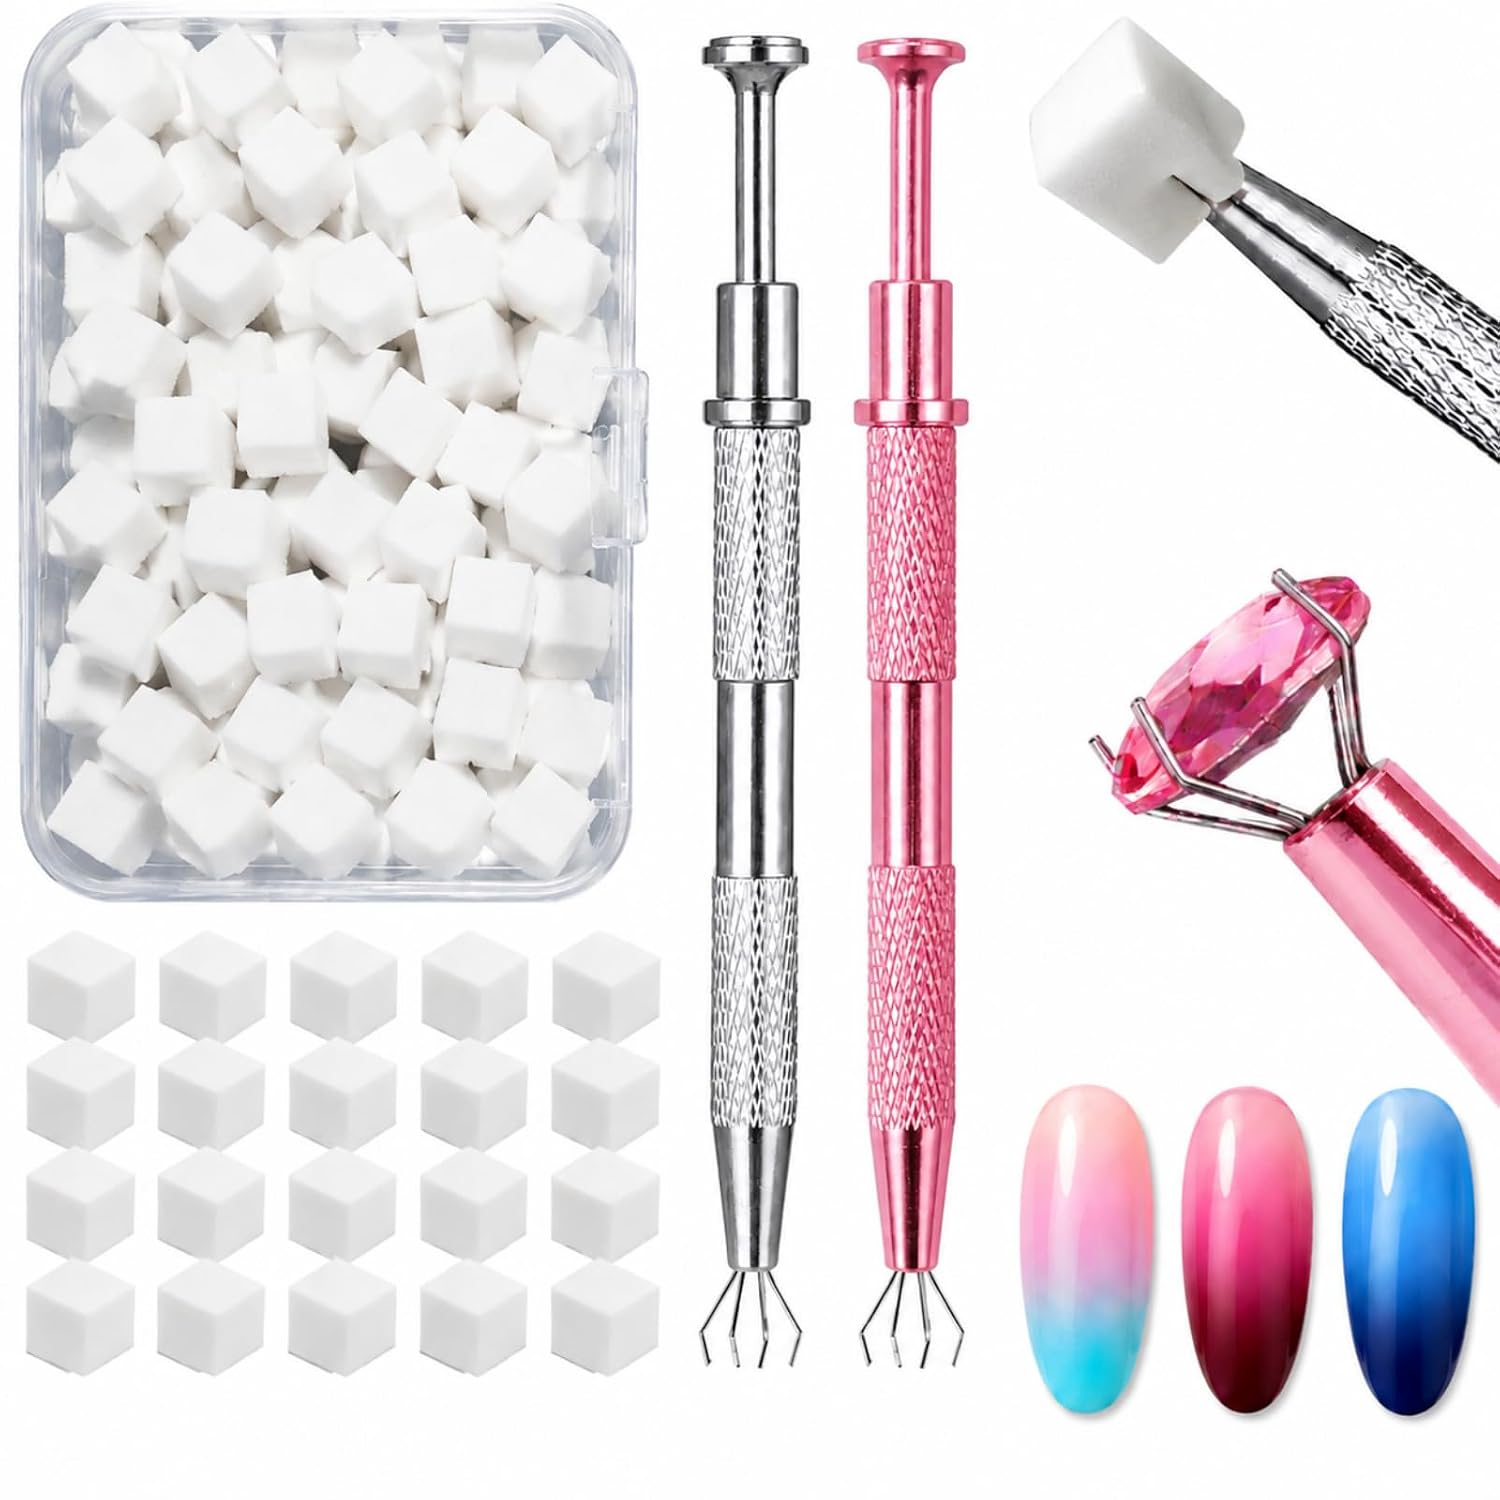
Small tools can make big differences in nail art. This guide explains how to use a 200-piece ombre nail sponges kit that supplies compact, soft sponges and two grabbing pens so you can achieve gradients, aura effects, chrome blending, and other layered looks whether you are a beginner or a technician.
What’s included in the kit
The kit contains:
- 200 soft mini sponges — each measures 0.39 × 0.39 × 0.39 in and is made from a high-elastic, flexible material that conforms to a nail’s curve.
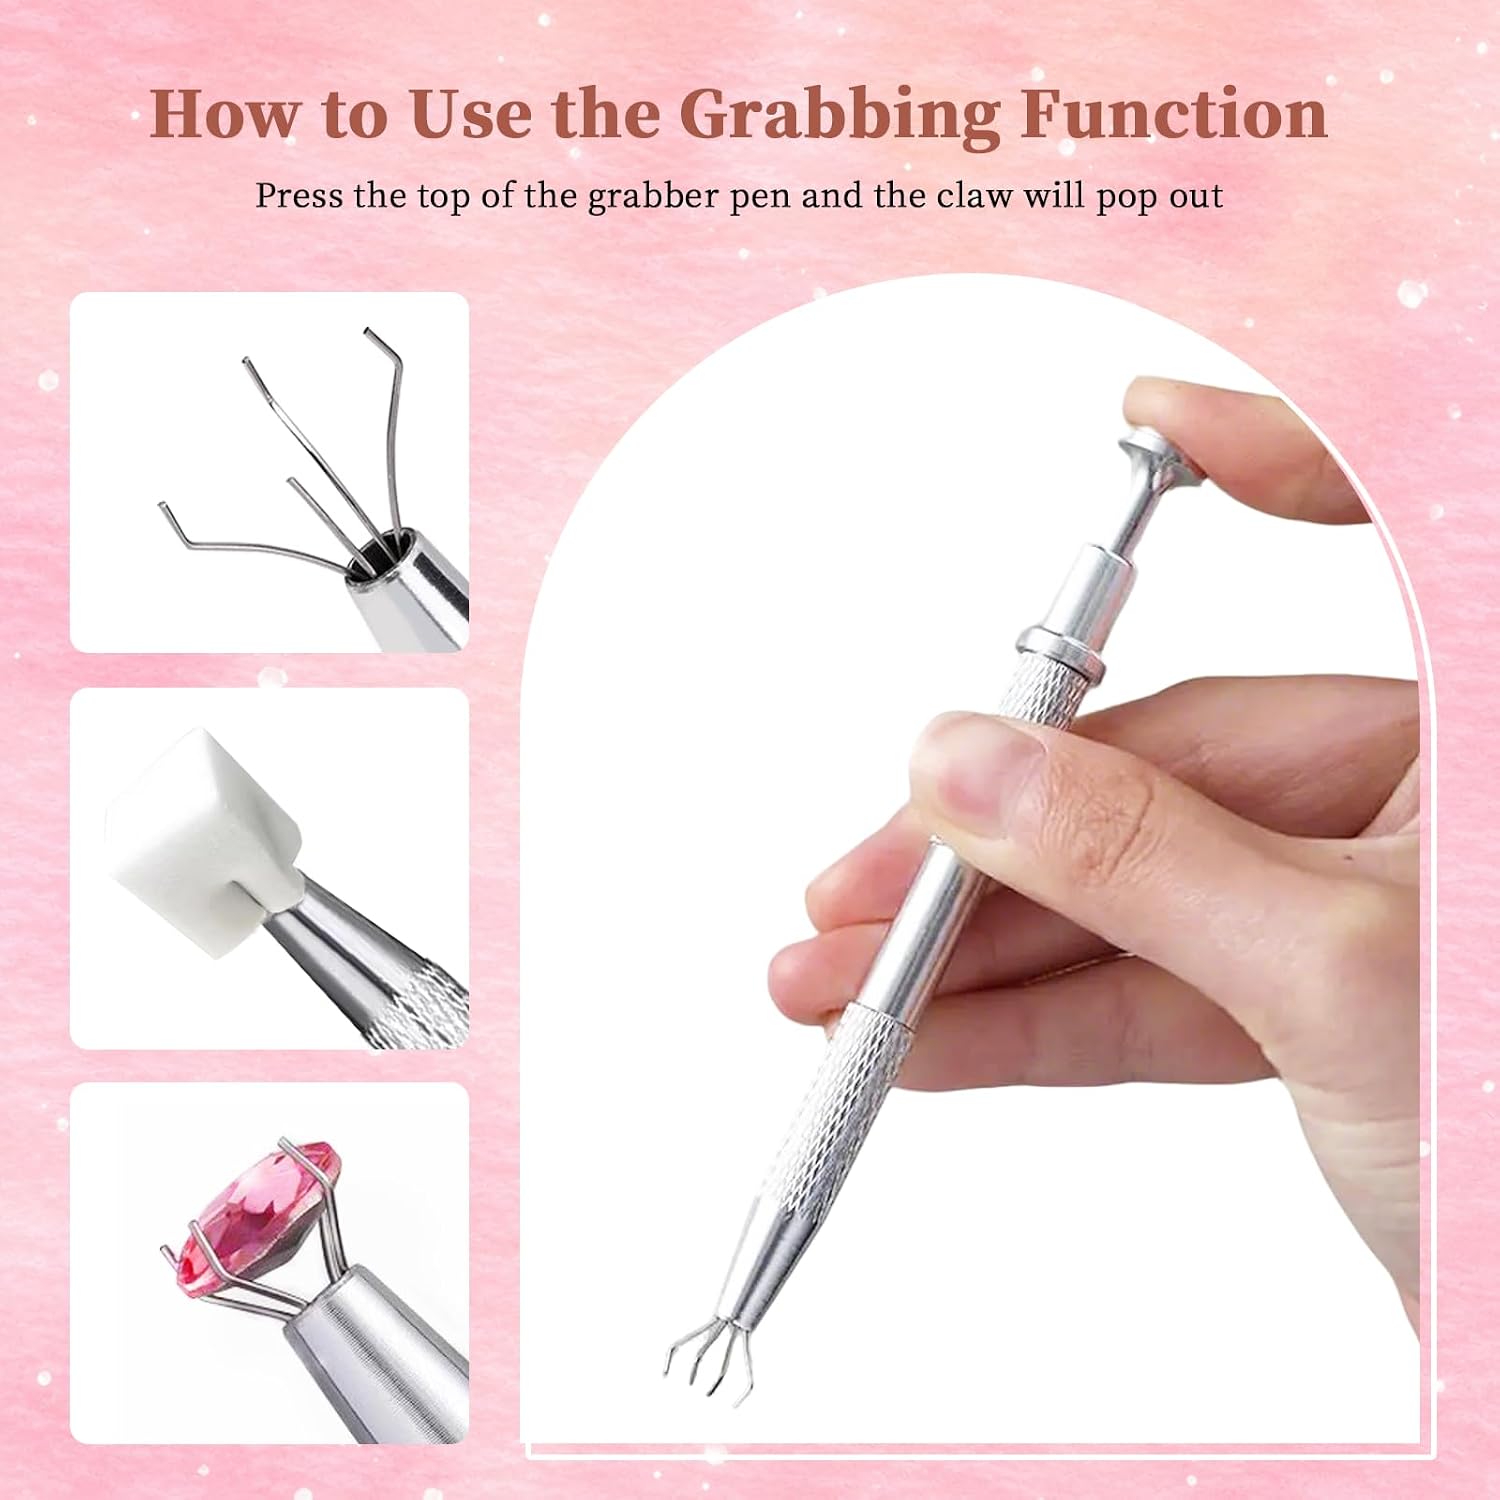
- Two grabbing pens — one silver and one pink, with a press-to-open retractable claw and a non-slip grip for holding sponges or picking up small decorations.
- Compact storage box — useful for organizing and transporting the kit.
Key features and what they mean in practice
- Ultra-soft, high-elastic sponges: Their flexibility helps create smooth polish blending across the nail surface. Each cube has six usable faces, increasing value per piece.
- Disposable and mess-free: These sponges are designed for single use to avoid cross-color contamination and reduce cleanup after complex blends.
- Grabbing pens for precise handling: The retractable claw lets you hold a tiny sponge without touching its working face; the pens also assist with placing small rhinestones or decorations.
- Portable storage: The compact box keeps components organized for home use or on-the-go touch-ups.
Step-by-step: basic ombre or gradient using the kit
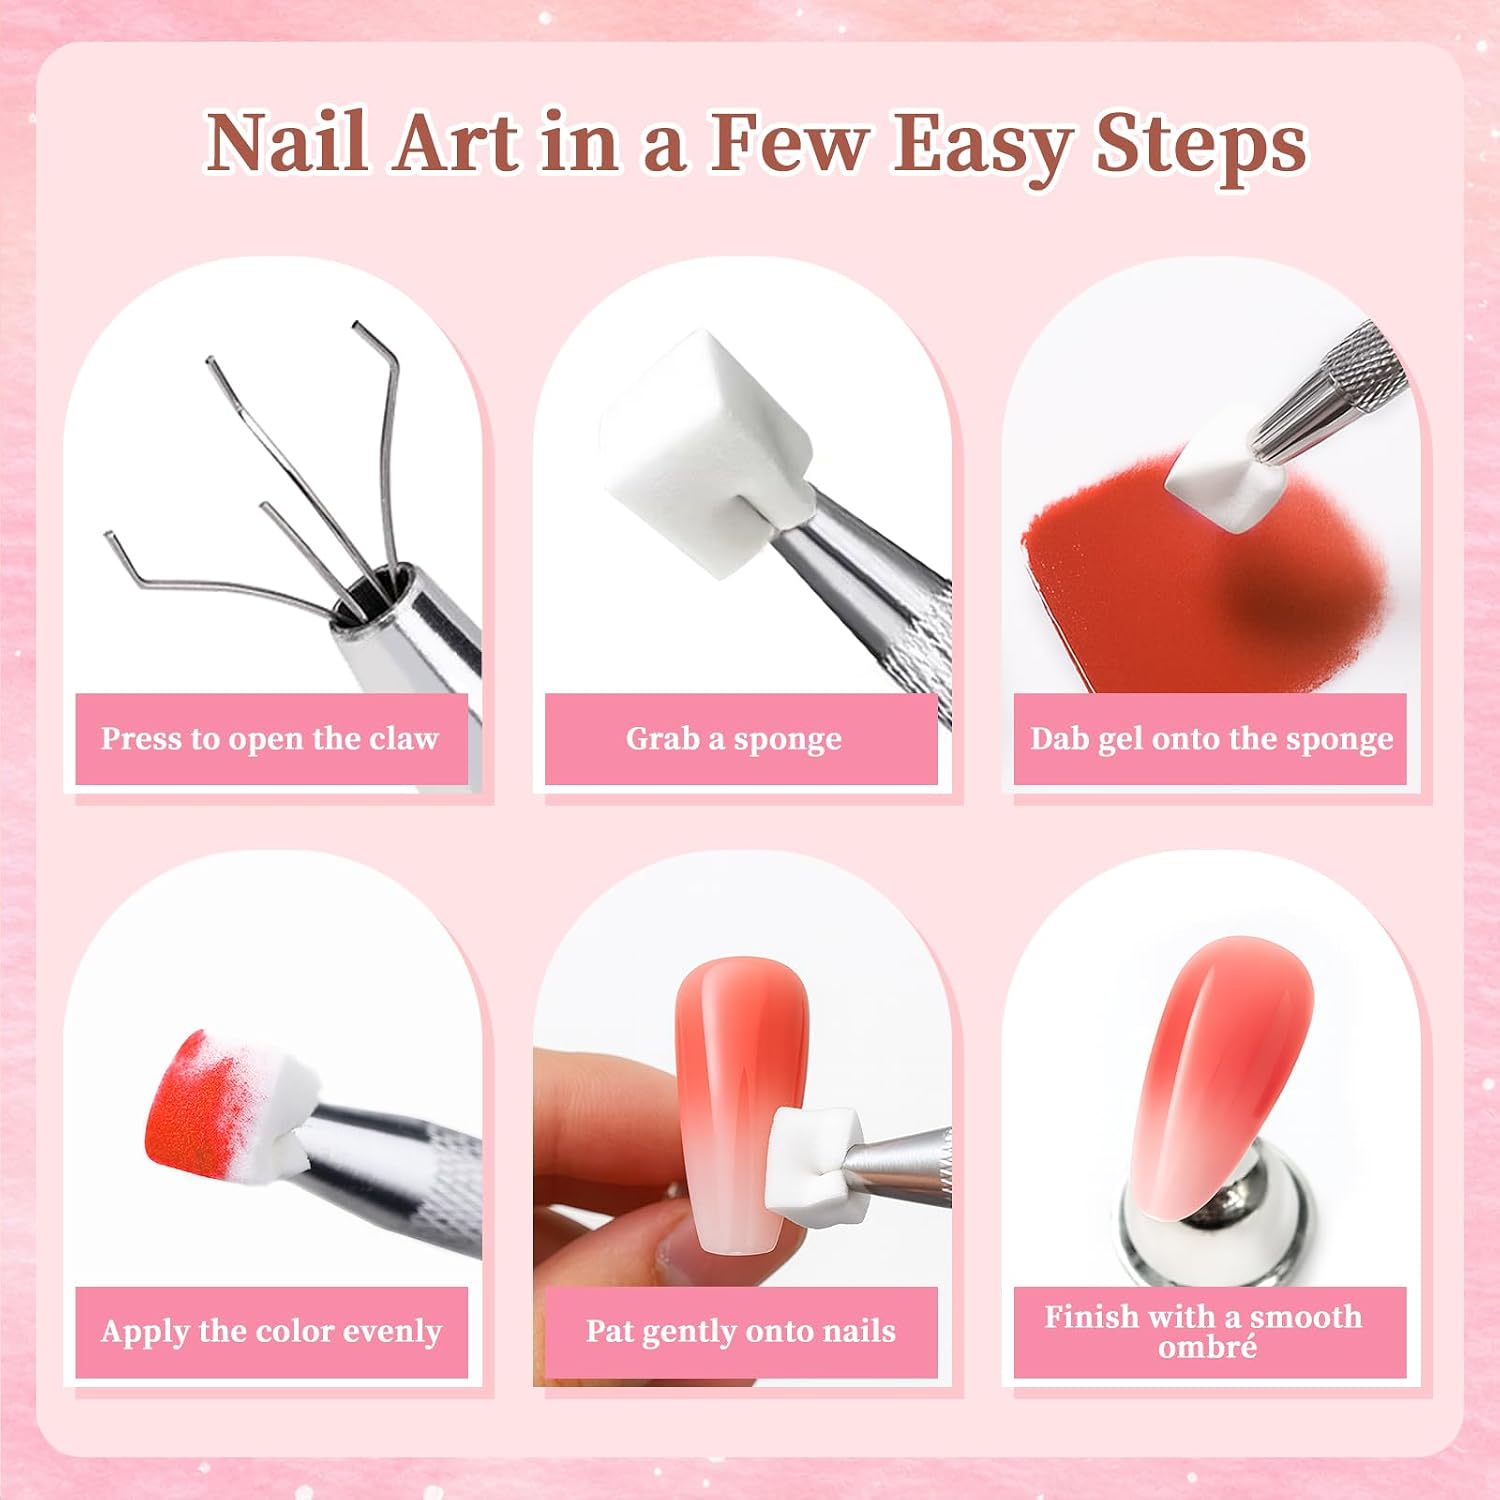
- Prep the nail: Start from clean, filed nails. Apply a base coat and let it dry according to your polish instructions.
- Load the sponge: Apply dots or thin stripes of two or more polish colors directly onto one face of a sponge cube. Use each face until color transfer weakens, then rotate to a fresh side.
- Stamp the color: Gently press the loaded sponge onto the nail with a quick, light motion to transfer color. Repeat until desired opacity is reached, using a new face or fresh sponge to avoid muddying tones.
- Clean edges: Use a brush dipped in remover or a peel-off barrier (if used) to clean excess polish around the cuticle before topcoat.
- Seal the look: Finish with a topcoat to smooth texture and protect the design.
Tips for better gradients and aura effects
- Layer subtly: Apply thin layers of polish to the sponge rather than heavy blobs — thin transfers blend more smoothly.
- Rotate faces: Each sponge has six workable sides; switching faces prevents color contamination and stretches your supply.
- Work quickly: Some polishes dry faster than others; load and press before the polish skins over on the sponge for a cleaner transfer.
- Use pens for control: The grabbing pens hold the sponge securely so you can place it accurately and keep hands away from wet polish.
- Embellish as desired: After sealing a gradient with a topcoat, add gems, rhinestones, or charms for extra shine — consider pairing the kit with a coordinating rhinestone set such as a pink multi-shape kit for embellishment; pink rhinestone set
How the grabbing pens expand your options
The press-to-open claw design gives two main benefits: it keeps fingers free of polish while you stamp, and it helps you pick up tiny decorations without using adhesive fingers. The non-slip grip improves control during delicate placement. The pens come in silver and pink so you can assign a pen for sponging and another for decorations if you prefer.
Suitability and common uses
- Beginners: The kit’s components are designed to make gradient techniques approachable without complex tools.
- DIY at home: Lightweight and portable, the kit is easy to store and take on-the-go.
- Salon or refill kit: The large quantity and disposable design make the set suitable for busy desks where quick color changes are frequent.
- Specific techniques: Recommended for ombre, gradient, aura nails, chrome powder blending, blush effects, and detailed multi-color designs.
Limitations and practical considerations
- Single-use intent: Sponges are designed to be disposable. While each sponge offers six faces, the manufacturer recommends using them singly to avoid color mixing, which means frequent replacement during extended sessions.
- Texture transfer: Sponging can leave slight texture that a topcoat will smooth, so plan to finish with a suitable sealing coat.
- Not a polish substitute: These tools assist with application techniques but do not replace base or topcoat products, powders, or other specialized materials.
Safety and care notes
- Avoid skin contact with wet polish: As with any polish application, minimize direct contact between wet polish and skin or cuticles to prevent irritation.
- Store components closed: Use the included box to keep sponges clean and to protect the grabbing pens when not in use.
- Dispose responsibly: Because the sponges are intended for single use, discard used pieces according to local waste guidelines.
Conclusion
This ombre nail sponges kit delivers a large supply of soft, flexible mini sponges plus two grabbing pens and a storage box, aimed at simplifying gradient and aura nail techniques for beginners and professionals alike. Each sponge’s small cube shape and six usable faces make it economical to blend multiple colors, while the pens add handling precision. Price at the time of writing is USD 5.99 — prices may change. If you want to add sparkle after sealing a gradient, consider pairing the kit with small rhinestones or gems for finishing touches.